Showing posts with label Wyoming. Show all posts

Saturday, April 13, 2013

Night Time Photography, Searching for the Milky Way


Ancient Light, Westmoreland, New Hampshire


 Finding the Milky Way is an important step in getting great images of the night sky.  I've found a nice program that makes the search much easier.

This week is the International Dark Sky Week, to focus attention on the growing impact of light pollution on our ability to appreciate the
Night Photography, Old faithful
Old Faithful Geyser & the Milky Way
Yellowstone, Wyoming
glorious beauty of the night sky. Recently star photography has become very popular. The new, highly sensitive digital cameras have made it possible to look deeply into space, reveling dense star fields that couldn’t be imagined by the naked eye. Star field photography involves special techniques to capture the best depth of view, while limiting star movement and noise. It typically involves a balance between high ISO noise and the motion blur that occurs at longer shutter speeds. I have discussed star track photography in a previous article and there are many excellent, detailed tutorials which describe this process as well as techniques to record the stars as points of light. Fellow New England Photography Guild member Mike Blanchette, has wonderful series of articles in our NEPG Blog, beginning with "Aim for the Stars". Without much effort you can learn the simple requirements for stunning star photography, but in addition to the technical aspects, it is crucial to know when and where to look for the best show. 


Searching For the Milky Way
Nice Stars but No Way
Finding a location with limited light pollution and something interesting to place in the foreground is important, but, very often, the key factor is finding the Milky Way. Any review of star field images will show that the most of the striking star pictures include the Milky Way. A good part of its appeal comes from how difficult it is to see with unaided eye. Here in the country, with only a modest amount of light pollution, the Milky Way is usually seen as a vague smudge across the sky, hence the reference to Milky. Forget about it in the city.


When I first started capturing images of the night sky, I was stunned by how brilliantly the Milky Way exploded into my images. With the
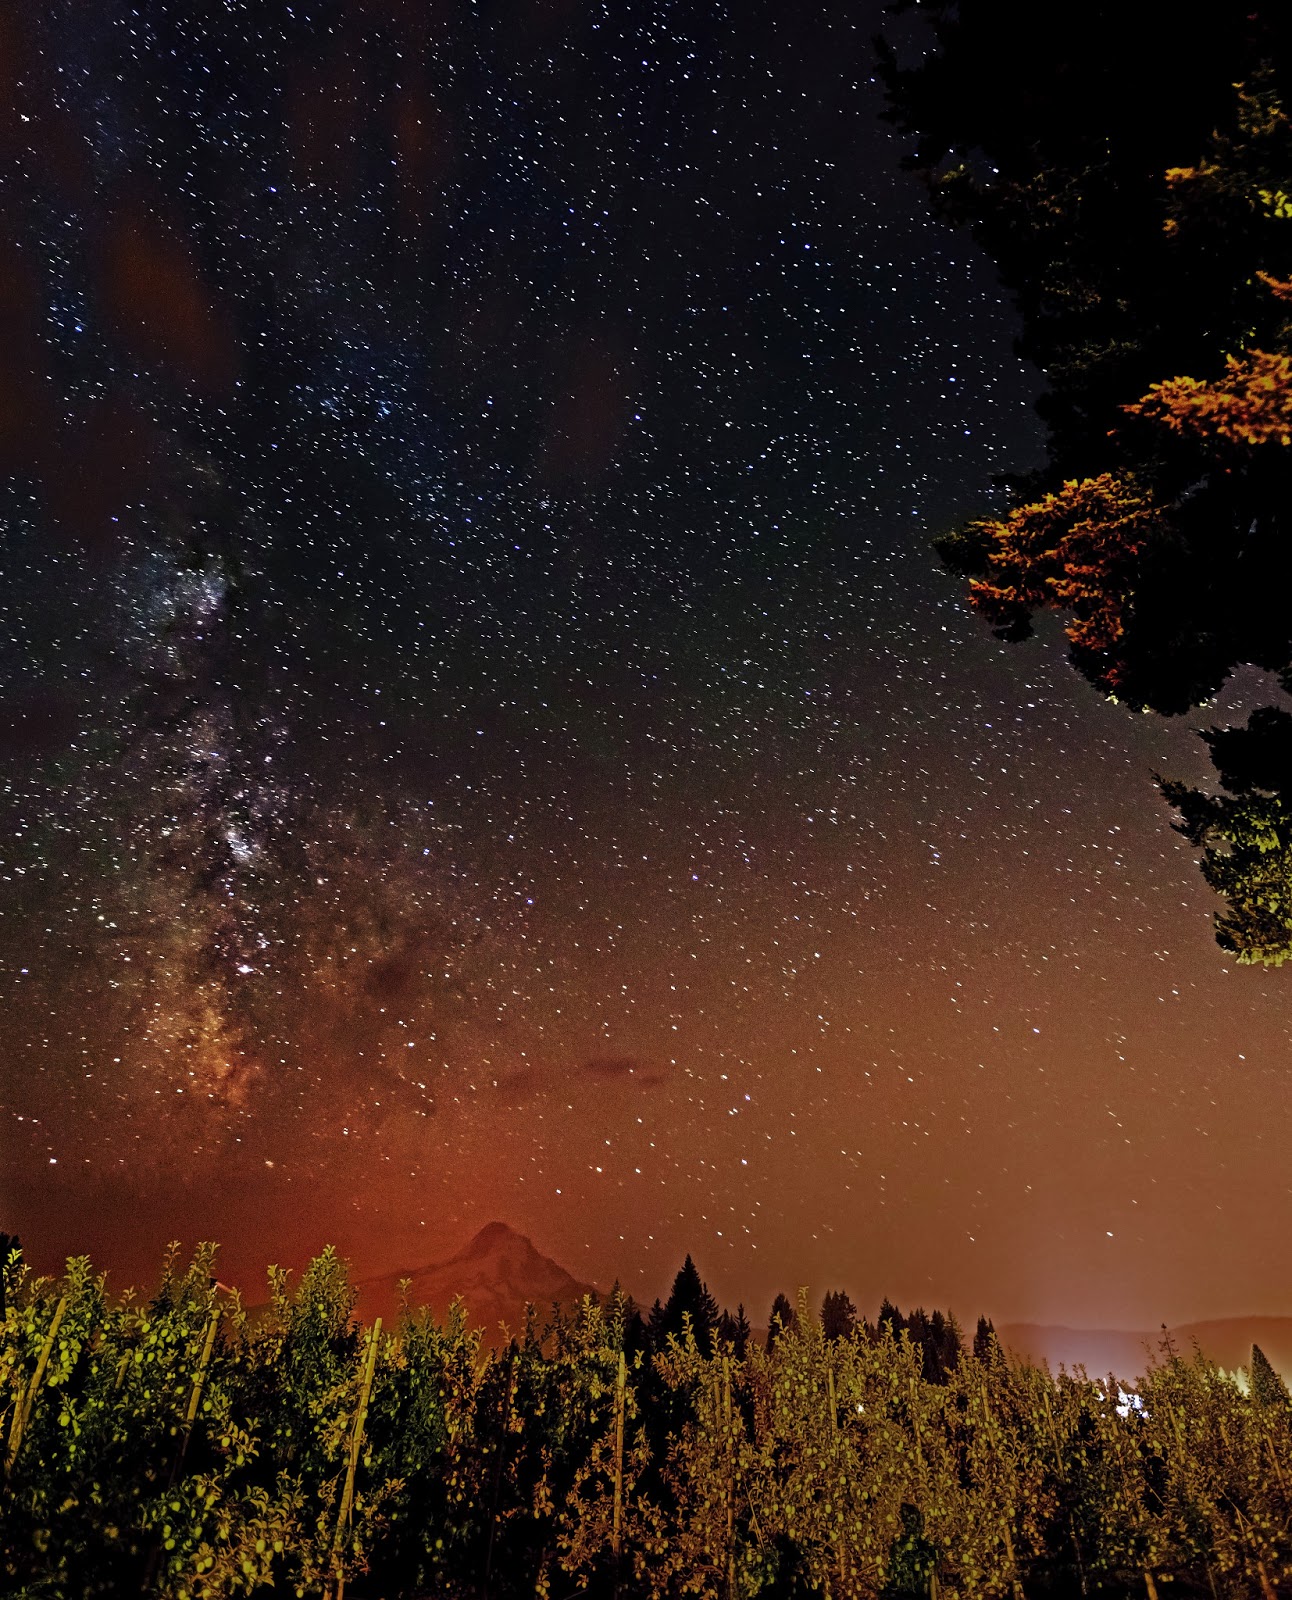
Mt Hood and Milky Way, Night Time Photography
Milky Way Rising Over Mt Hood, Oregon
combination of high ISO and a long exposure, light from millions of distant suns becomes gloriously apparent in all of its luminous colors. But how do you find the Milky Way. How can you predict when it will be up in the sky, and how can you predict its location so you can find a view point with low light pollution and interesting foreground elements. In our region the Milky Way is highest in the sky during the summer months, sadly when the atmosphere is less clear, but it does show up this time of year especially in the early morning. My friends on the coast have an easier time finding clear views of the horizon across the water, while I must find high points with a view in the right direction.


There are many good night sky programs, which are wonderful for identifying constellations and planets, but often these are not great for locating the Milky Way and predicting the sky’s appearance in different locations on specific nights. If the program does not show the Milky Way, it is helpful to know that it is most prominent between the constellations of Sagittarius and Scorpio, but this doesn’t provide a sense of the full display across the sky. Enter Stellarium.


Stellarium

I haven’t done an exhaustive search but I have found a great free-ware program that does a beautiful job. It is a bit like a nighttime version of the Photographer’s Ephemeris. Stellarium is a free open source
Stellarium program finds the Milky Way, night time Photography
Stellarium : Chesterfield, NH
planetarium. It shows a realistic sky in 3D, just like what you would see with the naked eye, binoculars or a telescope. You can easily move the point of view to any GPS Coordinates or choose from a rather overly exhaustive list of locations. The date and time of day is easily adjustable and the sky shows the effects of developing sunrise and sunset. The range of possible display adjustment is amazing. Of
course you can show the constellations and planets, but you can also
Milky Way, As Predicted
Chesterfield, NH

adjust the level of atmospheric disruption and even the number of shooting star per hour. Most importantly for me, the program shows the full extent of the Milky Way. Once you select the date and your location, you can click through the hours watching the Milky Way appear and progress across the sky. Last weekend I used the program to find the Milky Way in the southern sky just before dawn. I was able to find a dark location with a clear view of the horizon. I was still competing with light from Brattleboro, the approaching sunrise, and scattered clouds, but Stellarium showed me what to expect and confirmed that I might be able to get a better look if I get there a little earlier next weekend.


Stellarium is one of those rare programs that beautifully solves a specific problem and it is FREE. Give it a try. You will find many other interesting features. One of my favorites is that, when you click on a star, the program tells you the name of the star and its distance in light years. The program is not a glitzy multimedia experience. I doesn’t offer high resolution images of the planets or other nighttime features, but for dynamically following the sky, it is great. The program is currently available for Mac, PC and Linux. An iPad version is out there but it doesn’t seem to be available in this country. I’m sure there other programs that work similarly. I would love to hear about them, but you can’t beat the price. 


Wish for some nice clear weather over the next couple of days and get ready to get up early.


Stellarium Web Site

Jeffrey Newcomer
partridgebrookreflections.com

Wednesday, August 22, 2012

Photographing the Grand Teton National Park


Smoke Gets in Your Eyes
Jackson Lake Smoke Grand Teton National Park
After our all to short visit to Yellowstone Susan and I headed south to Jackson Hole and the Tetons. It was years ago that we had driven by these mountains on our way across country, and we were excited to finally have a few days to explore. We stayed in a great bed and breakfast in Jackson, but, sadly, we discovered that the dramatic mountains were largely obscured by the smoke from several forest fires in Idaho. We still had a wonderful time hiking the mountains and exploring the trendy town of Jackson, but photographically, the experience centered on trying to find ways of getting past the murk to capture memorable images of this iconic location.

So what can you do when smoke or haze obscures your beautiful landscape?

Patience
First you can wait and hope for a storm to pass through blowing away the grime. Unfortunately this didn't happen for us. I shrugged and promised to come back again, sometime, and then I had to make do. 


Get Close

Inspiration Point Trail
The impact of smoke and haze is magnified by distance. Some of the Tetons’ classic viewpoints, such as the Mormon Row of deserted farms, are several miles east of the mountains. On clear days, the classic barns and fences make wonderful foreground material against the rugged mountains, but through the smoke, the peaks were just a faint pastel backdrop. I quickly learned to seek out viewpoints closer to the peaks. The smoke still had its impact, but especially when hiking among the mountains, the effect was much reduced. And, of course, close encounters with the wildlife were always clear.


Mule Deer Fawn

Bull Moose


Celebrate the Foreground
Mormon Row Foreground

When the distant vistas are murky, it is a good time to focus on the foreground. I always look for good foregrounds to compliment my expansive landscapes, but in this situation, the sharp, clear foreground elements helped to offset the lack of distant majesty. Fortunately the Tetons are full of great detail; rocks, flowers, animals and old structures can all become nice foci of interest.  


Embrace the Smoke

Mormon Row Sunset
On our first night in the Tetons I decided to check out Mormon Row. This is traditionally a morning site with the warm sunrise illuminating both the barns and the distant mountains. Although I knew that the peaks would be obscured, I hoped to use the smoke to augment the sunset light. I was excited to see that by shooting through the murk the
Smoke Filtered Sunrise
waning sun was given added dimension. As it dropped behind the mountains, the rays of light became vividly palpable and with the mountains in silhouette the images became much more about the light and the foreground with the smoke just a necessary piece of the puzzle. The next morning from the same spot, the smoke still shrouded the mountains, but when I turned to face the sun, it was so heavily filtered that I was able to shoot the rising disc without blowing out the surroundings.


Back in the Digital Darkroom
Jackson Lake
Sharp Mask Enhanced Contrast
Of course post-processing can always help. With a careful selection, the mountains can be isolated for enhanced contrast and vibrancy. The Unsharp Mask tool can also be used to enhance contrast. In the Unsharp Mask menu (Filter/Sharpen/Unsharp Mask), I raise the radius setting to around fifty and then adjust the strength to achieve the desired level of contrast enhancement. This technique can work wonders on flat images regardless of the cause, including smoke and haze. It is a powerful tool that can be easily overdone, but in this case, I used a mask to limit the effect to the distant mountains and then fine tuned the impact by adjusting the layer's opacity slider.


HDR
HDR to the Rescue
HDR techniques can also be helpful. The image of the mountains behind the north end of Jenny Lake combines most of the techniques I have discussed. It was taken closer to the peaks and had strong foreground elements, but additionally I found that with HDR I could do a better job cutting through the smoke. I captured 7 bracketed images, and then used Photoshop’s HDR Pro just focusing on enhancing the contrast in the mountains.


Black & White Conversion
Smoke and haze unavoidably mutes the vibrancy of color in images and, in these situations, conversion to black and white can restore the photograph's impact.  Black and white images can be more aggressively edited without affecting color quality.  Finally contrast enhancement or HDR can be combined with black and white conversion and local adjustments to further restore the snap in those murky distant peaks.


Black & White Conversion, Schwabacher Road


Hidden Falls
The Grand Teton National Park is an amazing place and although I was terribly disappointed by the smoke, I enjoyed the challenge and, in the end I came away with images that have a different quality than those that are the typical postcard shots. Every now and then it is good to be forced adjust to challenging conditions, and vacation is the perfect time for fresh experiences.

Enough lame rationalizations. The next episode will feature Hood River and the Columbia River Gorge, highlighting spectacular waterfalls, majestic Mount Hood and of course a wedding. And all with much less smoke!